If you’ve ever found yourself realizing that ‘‘too much of a good thing” can be bad, you’re not alone. We’ve all been there - overindulging in shopping, exercising, eating, drinking, romancing, or binge-watching our favorite guilty pleasures on Netflix. We find something we like and dive headfirst into it, turning it into a habit that becomes hard to break. Time passes, money is spent, nights are wasted, and eventually, we decide to take a break and get ‘into recovery.’
Recovery, of course, is characterized as being a period of removal, reflection, and resurgence. It’s a time to ‘give ourselves a break’ from a habit or behavior that might be doing more harm than good. It’s time to turn off the TV, take a break from the bars and clubs, try out a new diet & exercise regime, or delete all our old photos from an ended relationship.
The purpose behind recovery is ultimately healing - and now and then, your nails deserve a little healing time, too.
When acrylics and gel polish hit the nail salon scene, they offered women a chance to have long, glossy, and hard-as-rocks nails every day of the week. If length is what you were lacking, acrylics were the answer. If your polish was prone to chipping, gel polish was the solution. When it comes to your nails, nothing beats the longevity and luster of acrylics or gel polish. But regularly applying, curing, or changing gel polish or acrylics can do some serious wear and tear on your nails, especially when it comes to the removal process.
If you can’t get to a salon to have your polish or acrylics professionally removed, then be good to yourself and make sure to practice these tips when it comes to at-home removal techniques:
First, Cut Off Any Extra Length of Your Acrylics.
Use a nail clipper to remove the excess length of your acrylics. Cut them down as much as you can, so that they just extend beyond the tip of your natural nail.
Next, File Away the Top Layer of Your Gel or Polish.
It’s important to file away the shiny, top coat of your polish. This allows your acetone nail polish remover to soak in and soften the remaining product. Use a hand nail file or electric filing tool, like the Bellasonic 4-in-1 Electric Nail File Set, to gently and precisely buff away the top layer of your polish. Once your nails look matte (and a little dusty!), move on to the next step.
Soak Your Nails with Pure Acetone, Cotton, and Foil.
This step is where the magic happens. Soak a cotton ball or pad in 100% pure acetone nail polish remover and put one on each of your nails. Wrap each of your nails in foil and let them soak anywhere from 15-20 minutes. The acetone helps to soften the product so that when you remove the foil - voila! your acrylic or gel polish is ready to be removed with a cuticle stick. Be sure to gently push the material away, rather than scrape!
Finally, Gently Buff Away Excess Product and Apply Cuticle Oil!
The step above should take care of most, if not all, of the acrylic or gel polish. But if there’s any stubborn product left over, the Bellasonic 4-in-1 Electric Nail File Set can help gently remove what’s left. It’s patented oscillating movement is designed to help reduce any of the burning or damaging effects that other electric nail tools can cause while buffing. Once your nails are clean and good-to-go, apply that cuticle oil! Be generous with your product, and be sure to rub it in. This is a step you cannot skip!
Now that your nails have been safely ‘detoxed,’ it’s time to give them a little time to breathe.
Continue to apply cuticle oil a few times a day for the next several days, and put the polish, gel, and acrylic powder on the back-burner. It may not seem like it, but your nails have been through a lot. They now need a chance to recover.
Naked nails don’t have to be unsightly, though: there are plenty of products available that can give your natural nails a freshly-manicured look.
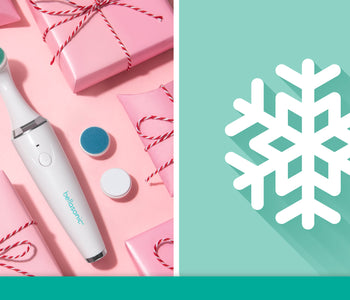
The Bellasonic 4-in-1 Electric Nail File Set is a great go-to tool for expertly trimming, shaping, buffing, and shining your nails. It comes with 4 separate, professional-quality discs that can shape your nails, buff away your cuticles, smooth out uneven texture, and leave them with a visible shine...all without applying a single product!
There’s nothing wrong with going au naturale every once in a while. Experts recommend letting your nails ‘breathe’ for a few days in between manicures and treatments. Removing acrylics and gel polish can be abrasive, even if done correctly, so it’s important to help your nails as much as you can in their recovery process.
Since your cuticles are the source of your nail growth, remember to keep them moisturized, healthy, and free of product and material. There are tons of professional-quality cuticle oils and creams available online that can give your nails the boost they need while recovering from gel polish or acrylic nails. And, if you apply a clear top-coat, you might find it easier to go a few extra days without running back to the salon. A few swipes with each of the Bellasonic discs can give your nails a professionally-manicured look without ever having to step foot in a salon.
There’s nothing wrong with a little recovery every now and then. In fact, ‘taking a break’ or ‘getting on the wagon’ can often leave us feeling like a weight has been taken off our shoulders. Don’t be afraid to take the weight off of your nails, either! And when you do, treat your nail recovery process just as important as you do your acrylics or nail polish. There’s no such thing as ‘too much of a good thing’ when it comes to the care and keeping of you.
4 Easy Steps to Beautiful Natural Nails Featuring 4 interchangeable color-coded discs gives you a perfect manicure or pedicure.

Works on Gel & Acrylic Nails. Remove gel polish, chips, and smooth damage from acrylic nail applications.


